


 Location
 Login
Login
For most U.S. golf cart owners who keep their carts outdoors or plan to add a full weather enclosure, an ABS or fiberglass hardtop is the better long-term investment. Canvas and soft-top options make sense for shade-only or seasonal use, but they won’t hold up to year-round sun, rain, and wind the way a hardtop will. Your two immediate next steps are: measure your cart (roof length, width, and strut spacing), then decide between canvas and hardtop based on how and where you use the cart.
Here’s what the numbers look like before you commit:
- Canvas/soft-top: Lower upfront cost, installs in roughly 30–60 minutes, lifespan typically 1–7 years depending on fabric grade
- ABS or fiberglass hardtop: Higher upfront cost, typical install time of about an hour or two and usually requires a helper, lifespan regularly reaches 15+ years with proper maintenance
- Safety first: Always secure the cart on level ground and use an assistant when handling heavy hardtops
Brand compatibility matters before you order anything. Club Car, E-Z-GO, and Yamaha each use different strut spacing and mounting patterns, and the wrong top won’t bolt up cleanly no matter how close the dimensions look. Confirm your cart’s make, model, and year before buying.
Table of Contents
- How do you measure a golf cart for a replacement canopy?
- What tools and hardware do you need before starting?
- How to install a canvas or soft-top canopy (step-by-step)
- How to install an ABS or fiberglass hardtop (step-by-step)
- Canvas soft-top vs. ABS and fiberglass hardtop: which should you choose?
- How to choose the right replacement canopy: compatibility, materials, and price
- Common installation problems and how to fix them
- How do you maintain a golf cart canopy and know when to replace it?
- Pro installer tips to get the installation right the first time
- Key Takeaways
- Hardtop vs. canvas: what daily fleet use actually teaches you
- Importjunkies carries the carts and accessories to make this easier
- Useful sources for deeper reading and official specs
How do you measure a golf cart for a replacement canopy?
Getting the measurements right before you order is the single step that prevents the most returns and wasted installs. You need five specific numbers, and you need to take them from the mounting points, not the body panels.
The five measurements you need
- Overall roof length: Measure from the front edge of the existing top (or front strut mounting point) to the rear edge. This is your primary size indicator.
- Roof width at the widest point: Measure across the top, not the cart body. Standard widths differ depending on the model.
- Front strut mounting hole spacing: Measure center-to-center between the two front strut bolt holes on the frame. This is the most critical fit dimension.
- Rear strut mounting hole spacing: Same measurement at the rear. Note whether rear struts mount to the cart frame or to a rear-seat kit frame.
- Rear-seat frame dimensions (if applicable): If you have a rear seat kit installed, measure the frame width and the distance from the front strut mounts to the rear strut attachment points.
Write every number down before you close the tape measure. A quick photo of each mounting point alongside the tape is worth more than memory.
Standard sizes and what they mean
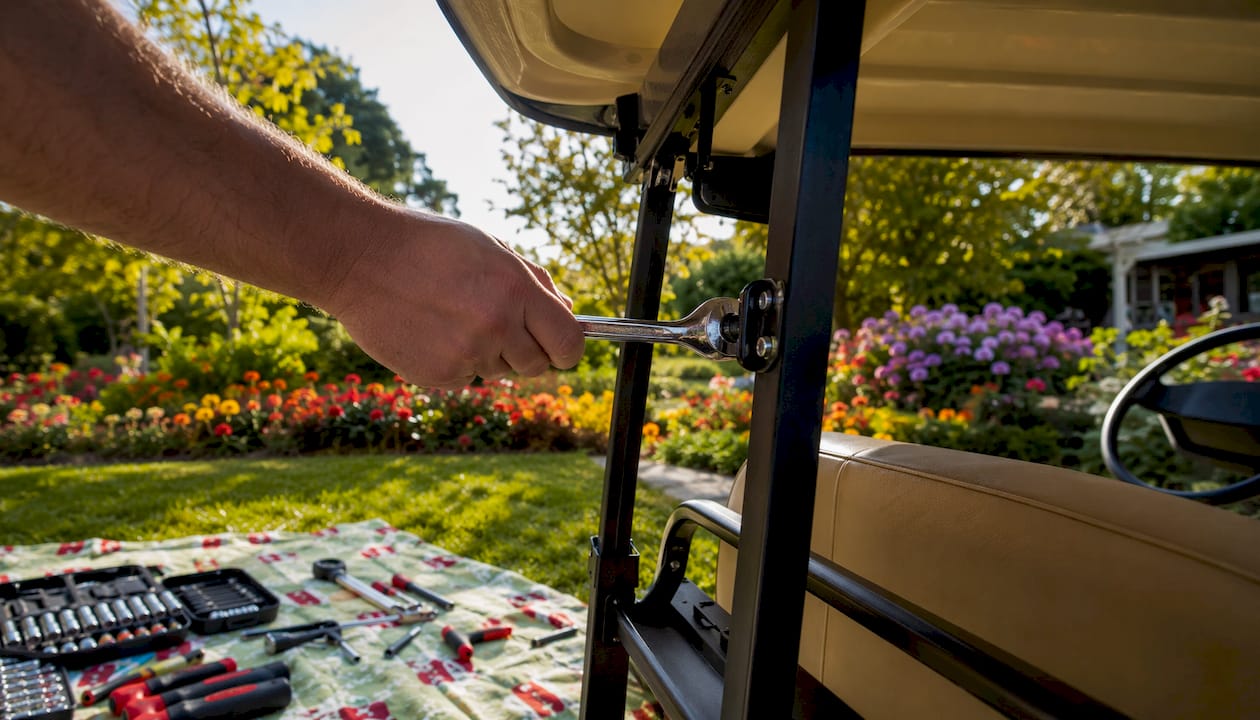
Yamaha Drive and Drive2 models commonly use a wider 70" standard top. Most Club Car and E-Z-GO 2-passenger carts use a 54" top. Those two sizes cover the majority of standard 2-passenger configurations in the U.S. market.
Extended tops in a larger size range are required when a rear seat kit is installed, because the rear struts mount to the seat frame rather than the main cart frame. Extended tops provide significantly more coverage over a standard top, and you cannot simply bolt a standard top to a rear-seat-equipped cart and expect it to fit. Limo or 6-passenger tops serve stretched or custom platforms and require full rear-frame measurements before ordering.
Pro Tip: Measure from mounting hole center to mounting hole center, not from the outer edge of the strut bracket. Measuring the bracket edge instead of the hole center is the most common sizing mistake and can throw your fit off by an inch or more.
What tools and hardware do you need before starting?
Pulling out the wrong tool mid-install wastes time and risks damaging new hardware. Get everything staged before you touch the old top.
Tool checklist
- Socket set (metric and standard)
- Torque wrench
- Drill with bits (include a 3/16" bit for pilot holes)
- Phillips and flathead screwdrivers
- Ratchet and extensions
- Hex key set
- Tape measure and marker
- Safety glasses and work gloves
Hardware to confirm or buy
- Stainless or zinc-plated bolts in the correct thread size for your cart’s strut mounts
- Rubber washers (protect the top surface from cracking under bolt pressure)
- Backing plates for any drilled holes
- Self-tapping screws for enclosure track installation
- Lock washers or threadlocker (Loctite Blue 242 works well for vibration-prone fasteners)
- Enclosure track hardware if you plan to add a weather enclosure later
Prep steps before you start
- Park on a flat, level surface and set the parking brake
- Disconnect the battery pack if any wiring runs near the mounting area
- Clear the work area and have a second person available for hardtop installs
- Inventory all existing hardware from the old top and set OEM pieces aside in a labeled tray
Pro Tip: Use a small muffin tin or a labeled parts tray to separate front and rear hardware. Mixing up bolt lengths between the front and rear strut positions is a common mistake that causes uneven clamping and can stress the top.
How to install a canvas or soft-top canopy (step-by-step)
Canvas installs are the more accessible DIY project. With the right prep, most owners finish in 30–60 minutes.
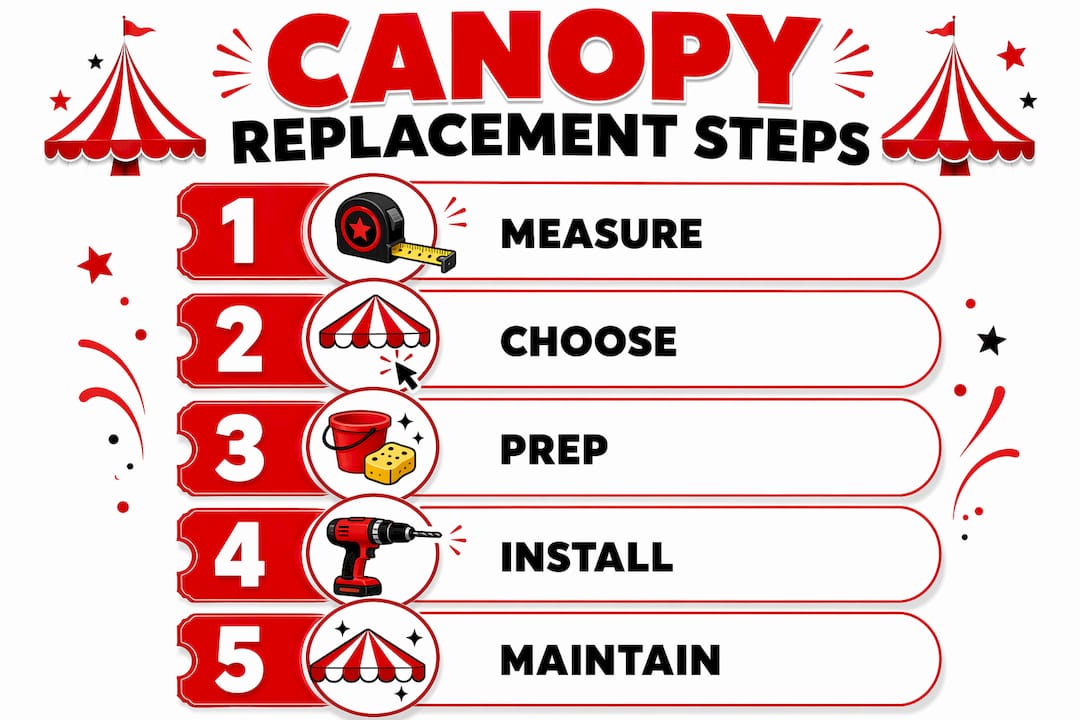
- Remove the old top. Unbolt or unclip the existing canvas from its bows and struts. Inspect the bows (the curved support rods) for rust or bending. Replace any that are deformed, since a warped bow will cause the new canvas to sag immediately.
- Lay out the new canvas. Spread it over the bows before attaching anything. Confirm the front and rear orientation, and check that any pre-cut holes or grommets align with your strut positions.
- Attach the front edge first. Slide the front hem pocket over the front bow, or clip the front edge to the front bracket depending on your kit’s design. Do not fully tighten at this stage.
- Work toward the rear. Pull the canvas rearward with moderate tension and attach the rear hem or strap. Many kits use a hook-and-loop strap or a snap fastener at the rear corners.
- Secure side fasteners and zip ties. Use the provided fasteners or zip ties to attach the canvas to the side bows. Space them evenly to prevent bunching.
- Tension and adjust. Pull the canvas taut from front to rear and side to side before locking down any fastener. Wrinkles at this stage mean uneven tension, which causes sagging and wind noise later.
- Final tighten. Once the canvas is wrinkle-free and centered, tighten all fasteners in sequence: front, rear, then sides.
A canvas top that sags or flaps at highway speed almost always traces back to uneven tensioning at step 6, not a defective product. Re-tension before assuming the top is the wrong size.
After install, do a quick water test with a garden hose. Check the seam lines and front edge for drips. Re-check all fastener tightness after the first two or three rides, since vibration tends to loosen canvas hardware quickly.
How to install an ABS or fiberglass hardtop (step-by-step)
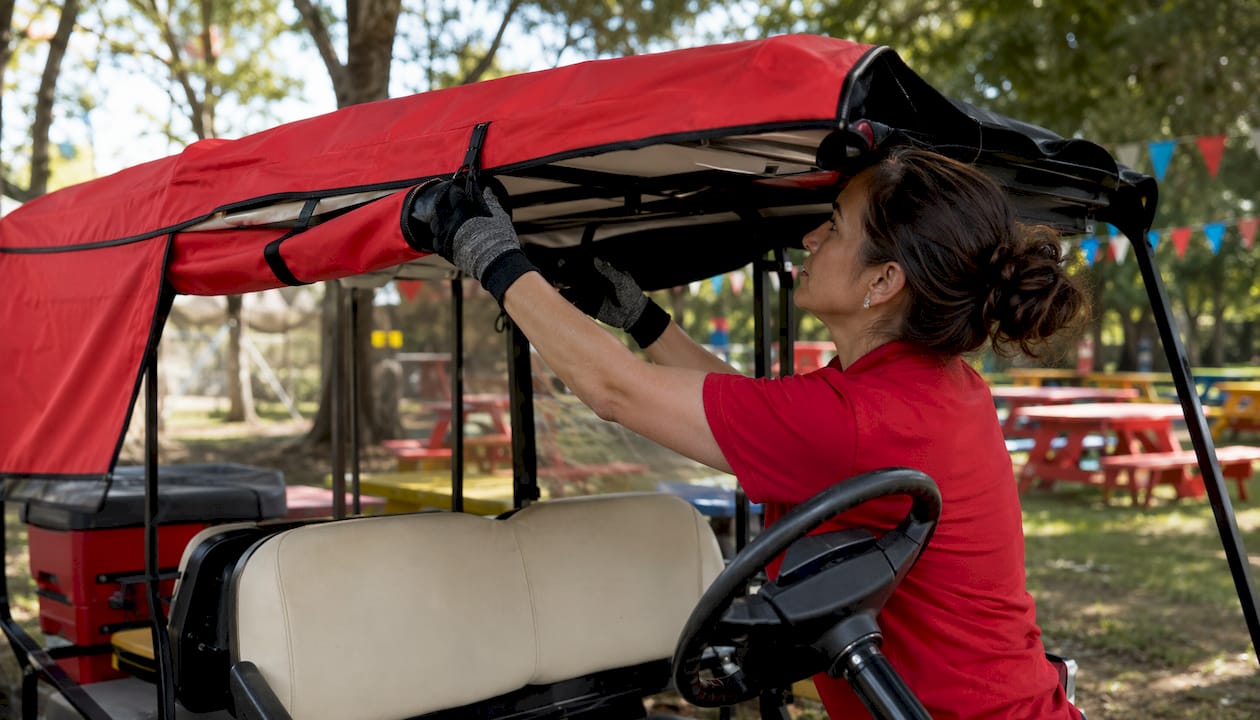
Hardtop installs generally take about one to two hours and require two people. One person cannot safely hold a hardtop in position and drive bolts at the same time, and trying to do so risks stress cracks in the top or a dropped panel.
- Inspect front struts. Check that both front struts are straight, undamaged, and securely bolted to the frame. A bent strut will throw the entire top out of alignment.
- Dry-fit the top. With your helper, lift the top into position and rest it on the struts without any hardware. Confirm it sits level and that the pre-drilled holes in the top align with your strut mounting points.
- Mark any new holes. If the top’s pre-drilled pattern does not match your strut spacing, use a marker to mark new hole locations. Use a center punch before drilling to prevent the bit from walking on the smooth ABS or fiberglass surface.
- Drill pilot holes if needed. Use a 3/16" bit for pilot holes. Drill slowly and keep the bit perpendicular to the surface. Back the top with a piece of scrap wood to prevent blowout on the underside.
- Install backing plates. Slide a backing plate behind each mounting hole before inserting bolts. Backing plates distribute clamping force and prevent the top from cracking around the bolt hole over time.
- Start with front bolts, leave loose. Insert front bolts with rubber washers and backing plates, but do not tighten yet. Leaving hardware loose until final alignment prevents the top from being locked into a misaligned position.
- Install rear bolts, leave loose. Repeat at the rear. Have your helper maintain upward support on the top while you work.
- Level and align. Step back and check the top from the front and side. Adjust until it sits level and centered over the cart.
- Tighten in sequence. Tighten front bolts first, then rear, then any side rail fasteners. Use a torque wrench and tighten evenly, alternating sides. Do not over-torque: ABS and fiberglass can crack under excessive bolt pressure.
- Attach enclosure rail if applicable. If you are adding a weather enclosure, mount the track to the top’s perimeter channel now, before the top is fully loaded with accessories.
Pro Tip: After the first three rides, re-check every bolt. Vibration from road surfaces works fasteners loose faster than most owners expect, and a loose hardtop can shift and crack at the mounting points.
Canvas soft-top vs. ABS and fiberglass hardtop: which should you choose?
The right choice depends on how you use the cart, where it’s stored, and whether you plan to add an enclosure. Here’s the full comparison.
| Option | Best for | Material | Size / Fit | Install difficulty | Price range | Durability / Weather protection | Compatibility | Warranty / Support |
|---|---|---|---|---|---|---|---|---|
| Canvas / soft-top | Seasonal shade, budget buyers | Canvas (600D, PVC-coated, Sunbrella) | Standard (54", 70"), Extended (80"–88") | Low, 30–60 min | Lower cost | 1–7 year lifespan, limited rain protection | Club Car, E-Z-GO, Yamaha | Varies by seller |
| ABS hardtop | Year-round use, enclosure-ready carts | ABS plastic | Standard, Extended, Limo (112"+) | Moderate, 1–2 hrs, helper needed | Mid-range | 15+ year lifespan, strong rain/UV protection | Club Car, E-Z-GO, Yamaha | Typically 1 year |
| Fiberglass hardtop | Premium builds, heavy-duty use | Fiberglass | Standard, Extended, Limo (112"+) | Moderate-high, 1–2 hrs, helper needed | Higher cost | 15+ year lifespan, rigid, excellent protection | Club Car, E-Z-GO, Yamaha | Typically 1 year |
| Extended tops (80"–88") | 4-passenger carts with rear seat kits | ABS or canvas | Extended | Moderate | Mid-range | Matches base material | Club Car, E-Z-GO, Yamaha | Varies |
| Limo / 6-passenger tops (112"+) | Stretched or custom platforms | ABS or fiberglass | Limo | High, custom fit likely | Higher cost | Matches base material | Custom / specialty | Varies |
Who should choose canvas
Canvas makes sense if you store the cart indoors or under a carport, use it only seasonally, or need the lowest upfront cost. It’s also the right call if you want a top you can remove and store during winter months. The trade-off is more frequent replacement and limited protection in heavy rain.
Who should choose a hardtop
If your cart lives outside, gets used in rain, or you plan to add a full weather enclosure, a hardtop is the practical choice. ABS is lighter and handles UV well at a lower price point than fiberglass. Fiberglass is heavier and typically more expensive, but it’s stiffer and holds its shape better under load. For fleet operators or daily-use carts, the longer lifespan of a hardtop makes the higher upfront cost straightforward to justify.
How to choose the right replacement canopy: compatibility, materials, and price
Ordering the wrong top is expensive and avoidable. Work through this checklist before you place an order.
Compatibility checklist
- Confirm your cart’s make (Club Car, E-Z-GO, Yamaha, or other), model name, and year.
- Verify whether your cart uses OEM mounting brackets or aftermarket struts from a previous replacement.
- Measure front and rear strut hole spacing (center-to-center) and compare to the product listing’s stated dimensions.
- If you have a rear seat kit, confirm the kit’s frame dimensions and whether the extended top kit includes rear strut hardware.
- Check whether the top includes mounting hardware or ships hardware-separately.
Material and finish considerations
ABS is lighter and resists UV degradation well, making it the practical choice for most owners. Fiberglass is heavier and costs more, but it’s more rigid and suits premium builds or heavy-duty applications. For canvas, fabric grade matters: 600D polyester is entry-level, PVC-coated canvas adds waterproofing, and Sunbrella-grade fabric offers the best UV and weather resistance among soft tops. If you plan to add an enclosure, confirm the top has a compatible track channel or perimeter lip before buying.
Price ranges and what drives cost
Size is the biggest cost driver. Standard tops (54" and 70") cost less than extended (80"–88") or limo (112"+) configurations. Material is the second factor: canvas costs less than ABS, and ABS costs less than fiberglass. Factor in freight for larger hardtops, since limo and extended fiberglass tops often ship as freight rather than standard parcel, adding to the total cost.
Questions to ask the seller before buying
- Does this top fit my specific make, model, and year?
- Is mounting hardware included, or do I need to order it separately?
- What is the return policy if the top does not fit?
- How is damage-in-shipping handled?
- Is a fitment template or installation guide included?
| Canopy type | Typical price range | Hardware included | Freight required |
|---|---|---|---|
| Canvas / soft-top (standard) | Lower cost | Usually yes | No |
| ABS hardtop (standard 54"–70") | Mid-range | Often yes | Sometimes |
| ABS hardtop (extended 80"–88") | Mid-to-upper range | Sometimes | Often |
| Fiberglass hardtop (any size) | Higher cost | Varies | Usually yes |
| Limo top (112"+) | Highest cost | Varies | Yes |
Common installation problems and how to fix them
Most fit and installation issues have straightforward fixes if you catch them early.
Common problems and quick diagnostics
- Uneven fit or one side sitting higher than the other: Usually means one strut is bent or the bolts were tightened unevenly. Loosen all bolts, re-level the top, and re-tighten in sequence.
- Canvas sagging in the center: Bow is bent or canvas was not tensioned evenly. Re-tension from front to rear, or replace the damaged bow.
- Leaks at the front edge or seams: Canvas seam sealant has failed, or the front hem is not seated fully over the bow. Re-seat the hem and apply a seam sealer rated for outdoor fabric.
- Enclosure panels won’t slide into the track: Track is misaligned or was mounted with a twist. Loosen the track screws, straighten the track, and re-tighten.
- Wind noise or flapping at speed: Fasteners are loose or canvas tension is uneven. Re-check all fasteners and re-tension the canvas.
Step-by-step quick fixes
- Loose bolts causing movement: Remove the bolt, add a lock washer or apply threadlocker, and reinstall. Re-torque to spec.
- Backing plate needed for a cracked hole: Drill out the damaged hole slightly, insert a backing plate, and use a larger-diameter washer on the top surface to distribute load.
- Top sitting slightly off-level: Place a rubber shim between the strut bracket and the top surface on the low side, then re-tighten.
- Sealant for a leaking seam: Clean the seam with isopropyl alcohol, apply a flexible outdoor seam sealer (such as Seam Grip or a silicone-based product), and allow to cure fully before water testing.
A top that is more than an inch off in any dimension after all adjustments usually indicates the wrong size was ordered, not an installation error. Compare your original measurements against the product’s stated dimensions before attempting further corrections.
When to stop DIY
Stop and call a professional installer if you find structural cracks in the struts, large fiberglass fractures in the top panel, or mounting patterns that are so far off that new holes would land within half an inch of existing ones. Drilling too close to an existing hole creates a stress concentration that will crack the top under normal vibration.
How do you maintain a golf cart canopy and know when to replace it?
Routine care extends the life of any top, but there are clear signals that tell you replacement is the right call.
Routine maintenance checklist
- Monthly: Wipe down the top surface, check for loose fasteners, and inspect the front and rear strut mounts for rust or movement.
- Seasonally: Apply a UV protectant spray to canvas tops. Check seam lines for cracking or separation. Inspect enclosure tracks for debris that could bind the panels.
- Annually: Do a full inspection: check for warped edges, brittle or chalky plastic on ABS tops, delamination of the waterproof coating on canvas, and any cracks around mounting holes.
- Before and after winter storage: Remove canvas tops for indoor storage if possible. Inspect hardtops for any cracks that may have developed from freeze-thaw cycles.
When to replace
Replace the canopy when you see any of these conditions:
- Widespread cracking or brittleness in ABS or fiberglass that covers more than a small localized area
- Permanent delamination of the waterproofing layer on canvas (water soaks through rather than beading)
- Warped edges or persistent leaks that do not respond to sealing or re-tensioning
- Structural damage to the struts that cannot be corrected with replacement hardware
- Sagging that returns immediately after re-tensioning, indicating the canvas fabric itself has stretched beyond recovery
Canvas tops in the 600D range typically last 1–3 years under regular outdoor use. PVC-coated and Sunbrella-grade canvas can reach 5–7 years with proper care. ABS and fiberglass hardtops regularly reach 15+ years when maintained correctly. When repair costs approach or exceed half the cost of a new top, replacement is the more economical path.
Pro installer tips to get the installation right the first time
A few non-obvious practices separate a clean, long-lasting install from one that causes problems six months later.
When installing enclosure tracks, do not rely on factory holes. Factory holes are punched for the original top’s design and often do not align with aftermarket track systems. Use a template, mark new hole locations with a center punch, and drill pilot holes with a 3/16" bit. Secure the track with backing plates and the provided nuts and bolts. This prevents the stress cracks that appear when a track is forced into a slightly misaligned factory hole.
Pro Tip: When sliding enclosure panels into a newly installed track, apply a small amount of silicone lubricant to the track channel before the first use. Panels that bind on a dry track can deform the track lip, which makes the binding worse over time, not better.
Inspect for warped edges and brittle plastic every time you re-check fasteners after a season of use. A top that has started to warp at the edges will not seal correctly against an enclosure, and no amount of re-tightening will fix a panel that has lost its shape. Catching this early means replacing the top before it causes enclosure leaks or panel damage.
For two-person hardtop installs, assign one person to hold and align while the other drives fasteners. Switching roles mid-install causes the top to shift and can result in misaligned holes that are difficult to correct without starting over.
Key Takeaways
Choosing the right replacement canopy comes down to four decisions: accurate measurements, material selection matched to your usage, confirmed brand compatibility, and a clean installation with the right tools and a helper.
| Point | Details |
|---|---|
| Measure mounting points, not body panels | Record front/rear strut hole spacing, roof length, and width before ordering any replacement top. |
| Match material to usage | Choose a hardtop (ABS or fiberglass, 15+ year lifespan) for outdoor/year-round use; canvas (1–7 year lifespan) for seasonal or shade-only needs. |
| Confirm brand fit | Club Car and E-Z-GO standard carts typically use 54" tops; Yamaha Drive/Drive2 models commonly use 70" tops; rear seat kits require 80"–88" extended tops. |
| Install with a helper and re-check fasteners | Hardtops need two people and 1–2 hours; re-tighten all fasteners after the first few rides to prevent loosening from vibration. |
| Importjunkies for carts and accessories | Importjunkies carries 4-seat electric golf carts compatible with extended and standard tops, with customer support available for fitment questions. |
Hardtop vs. canvas: what daily fleet use actually teaches you
Most guides treat the canvas vs. hardtop decision as a cost question. It isn’t, at least not primarily. The real variable is replacement frequency and the downtime that comes with it.
For a fleet operator running five or ten carts, a canvas top that needs replacing every two to three years means repeated labor, repeated freight costs, and carts out of service during the swap. A hardtop installed correctly and maintained annually can run for fifteen years without replacement. The math on total cost of ownership almost always favors the hardtop for fleet use, even when the upfront price is two or three times higher.
For a personal owner who uses the cart on weekends from April through October and stores it in a garage all winter, canvas is a perfectly rational choice. The lower upfront cost is real, the install is genuinely faster, and a canvas top stored indoors during the off-season can last longer than the industry average. The mistake is applying fleet logic to personal use, or personal logic to fleet purchasing.
One thing both groups tend to underestimate: enclosure compatibility. If there is any chance you will want to add side curtains or a full enclosure later, buy the hardtop now. Retrofitting an enclosure track onto a canvas top is possible but awkward, and the track rarely seals as cleanly as it does on a hardtop with a proper perimeter channel. Deciding on the top and the enclosure together, even if you install the enclosure later, saves a second round of drilling and alignment work.
Importjunkies carries the carts and accessories to make this easier
If you’re replacing a canopy because your current cart’s platform no longer fits your needs, Importjunkies offers a direct path to a compatible new cart with accessory support built in. The 48V Electric Golf Cart 4 Seater Renegade Edition and the Silver Renegade X Edition are both 4-seat platforms with factory dimensions compatible with extended and standard top kits. The Lifted Renegade+ 2.0 suits owners who need extra ground clearance and are planning a custom canopy fitment.
Larger hardtops and extended tops often ship as freight, and Importjunkies can advise on shipping options and local pickup where available. If you need help confirming which top size fits a specific cart in the catalog, the customer support team can walk you through fitment before you order. Browse the current cart listings at importjunkies.com or contact support directly for fitment guidance and accessory recommendations.
Useful sources for deeper reading and official specs
These resources give you manufacturer-level detail on fitment, installation sequences, and material guidance that goes beyond what any single buying guide can cover.
- Golf Cart Tops & Canopies: Canvas, Soft Top & Hardtop: Covers material comparisons, lifespan data, and size guidance for standard, extended, and limo tops. Good starting point for material selection.
- Yamaha Golf Cart Roof Assembly: Complete Replacement Guide: Yamaha-specific installation and maintenance guidance, including how to identify warped edges and permanent waterproofing failure.
- E-Z-GO TXT Golf Cart Roof: Replacement, Installation, and Maintenance: Detailed E-Z-GO TXT fitment and two-person installation guidance with safety notes.
- MadJax X2 Enclosure Installation Instructions (Buggies Unlimited): Step-by-step enclosure track installation, including the template-and-drill method for aligning tracks to roof ribbing. Essential reading before adding an enclosure to a new top.
- 4-Passenger Top Kit Installation Instructions: Manufacturer installation sequence for extended 4-passenger top kits, including the loose-hardware alignment method and tightening sequence.
- Club Car Replacement Tops & Canopies (Buggies Unlimited): Club Car-specific fitment listings and compatibility notes for replacement tops and canopies.
For torque specifications and wiring disconnect procedures specific to your cart’s model year, consult the official service manual from Club Car, E-Z-GO, or Yamaha. These are available through authorized dealers and, for many models, through the manufacturers’ online parts portals.
Recommended
- Golf cart features: a complete buyer’s guide for 2026 – Saferwholesale || Import Junkies || Great Sports
- Golf Cart Buying Guide for Smart Buyers – Saferwholesale || Import Junkies || Great Sports
- How to inspect used golf carts: a step-by-step guide – Saferwholesale || Import Junkies || Great Sports
- Fully Enclosed Golf Cart Buyer Guide – Saferwholesale || Import Junkies || Great Sports


