


 Location
 Login
Login
A steam shower installation needs four non-negotiables: a properly sized generator, a dedicated 240V electrical circuit, copper or brass steam piping, and a vapor-proof enclosure rated to keep moisture out of your walls. Before you touch a wall stud, measure your enclosure’s volume and pick a generator location, because those two decisions shape every rough-in dimension that follows.
TL;DR:
- Proper sizing of the generator depends on calculating the room’s volume and choosing a unit with sufficient kilowatts, especially for larger or natural stone enclosures.
- Copper or brass piping is essential for the steam line, which must be continuously sloped and insulated to prevent condensate buildup, avoiding plastic pipes entirely.
- Installing a vapor-proof membrane rated below 0.5 perms and sealing all penetrations with steam-rated caulk is crucial to prevent moisture intrusion and enclosure failure.
- Sequencing the installation steps correctly, including finalizing measurements, rough-in plumbing and electrical, and conducting a full steam test before finishing, minimizes costly rework.
- The cost of a steam shower varies widely based on size, materials, and customization, with prefab kits offering lower costs and simplified installation compared to full custom builds.
Table of Contents
- Building A Steam Shower Installation Checklist Before You Start
- What Specs Do You Need For The Generator, Steamhead, And Piping?
- Why Waterproofing Determines How Long Your Steam Shower Lasts
- How Do You Sequence A Steam Shower Installation From Start To Finish?
- How Much Does A Steam Shower Installation Cost?
- Keeping A Steam Shower Running: Maintenance And Troubleshooting
- What Import Junkies Brings To Your Steam Shower Project
- Ready For A Prefab Steam Shower That Skips The Guesswork?
- Sources
Building A Steam Shower Installation Checklist Before You Start
Get the math right before anyone picks up a tool. Multiply length by width by height in cubic feet. That number determines generator size, and it’s the single most common point where homeowners undersize equipment and end up with a shower that never gets properly hot.
Finish materials matter just as much as volume. Tile and glass hold less heat than natural stone, so a stone-heavy enclosure needs more generator capacity than a same-sized tiled one.
Lock these details in before framing closes:
- Ceiling slope: at least 2 inches of drop per foot, angled toward one wall, so condensation runs off instead of dripping on your head.
- Bench depth: 15 to 20 inches, positioned so steam circulates underneath rather than pooling against a solid base.
- Control placement: mounted 4 to 5 feet above the floor, outside the direct steam path but within easy reach.
- Steamhead location: 6 to 12 inches above the floor, on the wall opposite the bench, aimed away from where anyone sits.
- Door type: a sealed, steam-rated door or panel, since a standard shower door will leak vapor around the frame.
Hand your contractor or supplier the cubic footage, the finish material, and these five measurements. That’s the full package needed for an accurate generator recommendation and material quote.
What Specs Do You Need For The Generator, Steamhead, And Piping?
Generator sizing follows the room’s cubic footage, and most manufacturers publish kilowatt charts tied directly to that number. A small tiled shower under 100 cubic feet might run on a compact unit, while a large stone enclosure can require double the output. Placement matters as much as sizing: the generator belongs in a dry, ventilated space outside the enclosure itself, such as a closet, vanity cabinet, or attic, where it stays accessible for service and away from ambient humidity.
The plumbing side has specific, non-negotiable sizes. Rough-in typically calls for a 3/8-inch cold water inlet feeding the generator, a 1/2-inch copper steam line to the steamhead, and a properly sized drain, with a pressure reducing valve set between 15 and 25 PSI.
Quick spec check: most residential steam generators need a dedicated 240V circuit protected by a 30 to 60 amp breaker, sized exactly to the unit’s kilowatt rating. Undersizing the breaker is a common callback.
A few details separate a smooth install from a service headache later:
- Never use PEX or PVC on the steam line. Copper or brass only, since standard plastic piping degrades under sustained steam heat.
- Slope the steam line continuously toward the shower, and insulate any run longer than 20 feet to cut down on condensate inside the pipe.
- Run control cable in its own dedicated conduit, separate from power wiring, to avoid interference and code conflicts.
- Hand-tighten the steamhead only. A wrench can crack the fitting and force a replacement.
- Skip saddle valves entirely; use a proper tee fitting with threaded unions so the generator can be serviced without cutting pipe.
Why Waterproofing Determines How Long Your Steam Shower Lasts
Standard shower waterproofing isn’t built for constant vapor exposure, and that gap is where most steam room failures start. Every steam enclosure needs a vapor-proof membrane rated below 0.5 perms, a stricter standard than typical bathroom vapor barriers, because sustained steam will find any gap in a lesser membrane and drive moisture into the framing behind it.
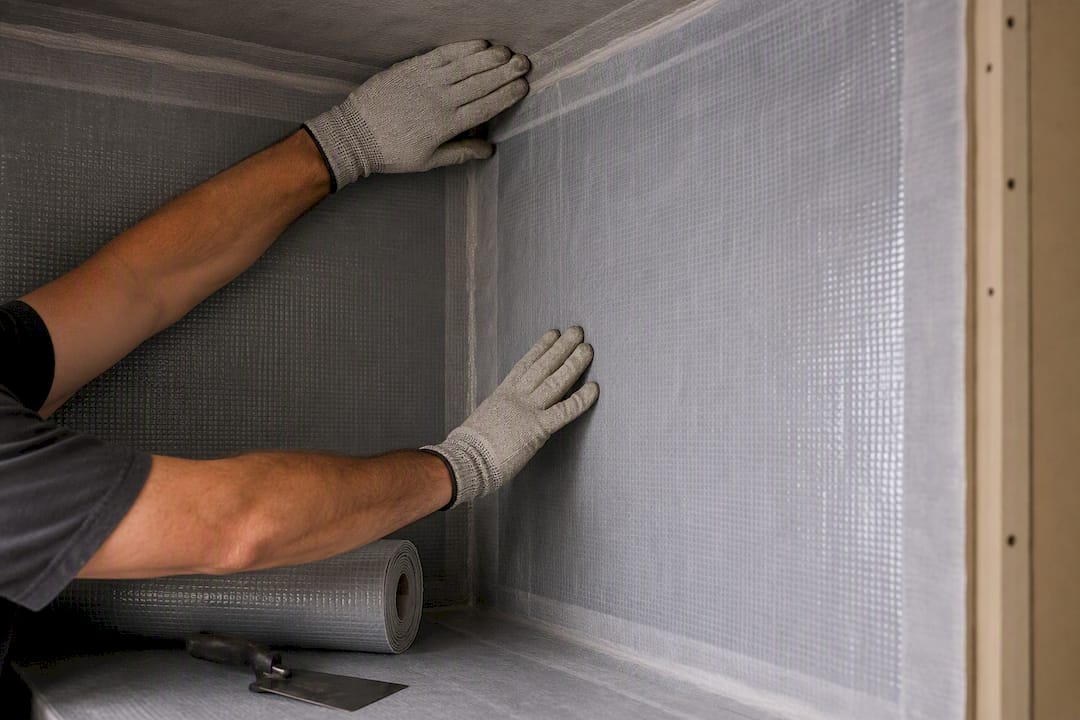
Material choice affects both performance and budget. Non-porous surfaces like tile and porcelain shed moisture efficiently and heat up fast. Dense natural stone looks striking but absorbs more heat before the room feels warm, which pushes you toward a larger, pricier generator.
A few finishing details prevent slow, expensive damage:
- Seal every fixture penetration, including the steamhead and light fixtures, with steam-rated caulk rather than standard silicone.
- Maintain that 2-inch-per-foot ceiling slope all the way to the wall, with no flat sections where water can collect.
- Extend the vapor membrane fully behind the ceiling, not just the walls, since ceiling condensation is where most leaks originate.
Pro Tip: Order your membrane and steamhead trim in the same week you finalize tile selection. Mismatched delivery timelines are the number one reason steam shower builds stall mid-project.
How Do You Sequence A Steam Shower Installation From Start To Finish?
Steam showers fail more often from sequencing mistakes than from bad materials. Follow this order and you avoid the tear-outs that turn a two-week job into a two-month one.
- Finalize the plan. Confirm volume, generator model, and rough-in measurements with your supplier or contractor before ordering anything.
- Rough in plumbing and electrical. A licensed plumber sets the water inlet, steam line, and drain; a licensed electrician runs the dedicated 240V circuit, since both connections typically require permitted, inspected work.
- Mount the generator and run the steam line. Position it in its ventilated closet or cabinet, then run copper piping with continuous slope to the steamhead.
- Wire the control panel. Keep control cable in its own conduit, separate from the power circuit feeding the generator.
- Tile and finish the enclosure. Install the vapor membrane first, then set tile or stone over it, maintaining ceiling slope throughout.
- Run a QA steam test. Before anyone showers in it, run a full cycle and check every seam, penetration, and the door seal for leaks.
Before drywall or tile closes anything up, verify the steamhead location, confirm ceiling slope with a level, and double check that subfloor tolerance sits within 1/8 inch across the span, since misalignment at this stage causes drain and door seal failures that are expensive to fix after the fact.
How Much Does A Steam Shower Installation Cost?
Prefab kits generally cost less than fully custom builds, mainly because custom stone work and larger generators drive labor and material costs up fast. A basic tiled enclosure with a standard generator sits at the low end of the range; a large stone shower with a bigger unit and full custom tile work sits considerably higher.
Budget for a few line items beyond the shower itself:
- Electrical panel upgrades, if your existing service can’t support a new 240V circuit.
- The vapor-proof membrane and waterproofing labor, which is not optional on a steam install.
- An auto-drain accessory, worth adding at rough-in in hard-water regions.
- Permit fees for the plumbing and electrical work, which vary by jurisdiction.
Timeline splits into two very different projects. Retrofitting a generator into an existing shower can often wrap in a few days. A full enclosure build, including framing, waterproofing, tile, and the steam test, typically runs one to two weeks depending on trade availability. Steam showers are generally considered worth the investment for the relaxation and circulation benefits, but that payoff depends on getting the waterproofing and materials right the first time.
Keeping A Steam Shower Running: Maintenance And Troubleshooting
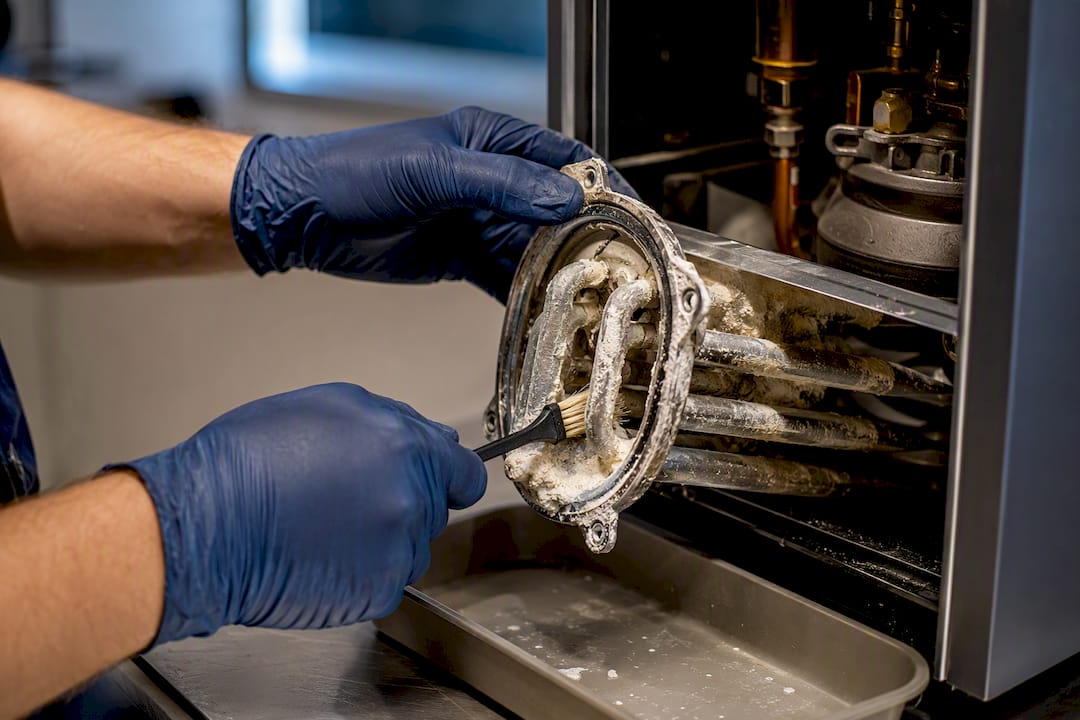
Hard water is the top cause of premature generator failure, and it’s also the easiest to prevent. An auto-drain, or a regular manual descaling routine, clears mineral buildup before it clogs heating elements and shortens generator life.
If you notice water dripping from the ceiling mid-cycle, check the slope first. A ceiling that’s gone flat or reverse-pitched over time, often from settling, will pool condensation instead of shedding it. Inspect the steam line for low spots too, since sagging pipe runs create condensate traps that spit water through the steamhead.
Electrical symptoms deserve quick attention:
- A breaker that trips repeatedly during startup usually points to a generator drawing more amperage than the circuit supports, which needs a licensed electrician.
- A generator that won’t heat but still powers on often signals a water supply issue, worth a call to a licensed plumber before assuming the unit is bad.
Pro Tip: Test your ceiling slope with a level once a year. Homes settle, and a slope that was fine at installation can drift out of spec within a few seasons.
What Import Junkies Brings To Your Steam Shower Project
Getting sizing and rough-in specs right the first time saves real money, and that’s the gap this guide is built to close. Import Junkies’ steam shower buyer guide and enclosure selection advice go deeper on matching enclosure size to generator capacity for specific product lines. Homeowners already living with a steam shower will also find the generator-first maintenance guide useful for building a descaling routine that actually prevents callbacks.
— Gary
Ready For A Prefab Steam Shower That Skips The Guesswork?
If the rough-in math above sounds like more coordination than you want to manage, a prefabricated enclosure solves the biggest variable: matching generator size to room volume before you ever cut copper. Complete prefab kits, like the 61-inch corner steam shower and bathtub enclosure, are available with specs and generator pairing worked out, reducing guesswork on kilowatt ratings or membrane requirements.

That said, a prefab kit still needs a licensed plumber and electrician for the water supply and 240V hookup. The equipment and specs are provided by suppliers; your local trades handle the connections that need a permit. Browse the full steam shower and equipment catalog to compare enclosure sizes, or reach out to sales for help matching a generator to your bathroom’s dimensions before you order.
Sources
- Steam Shower Installation Basics From MrSteam
- How to Build a Steam Shower - Amerec
- Engineerskill
- All About Steam Showers: How They Work, Cost and Installation - This Old House


