


 Location
 Login
Login
Squeegee the glass, wipe the chrome, and crack the door open the moment you step out. That single habit prevents most of the scale and mildew problems steam shower owners deal with. The rest comes down to two things: flushing or descaling your generator on a schedule tied to your water hardness, and never touching seals, stone, or gaskets with bleach or harsh acid.
TL;DR:
- Regular descaling is essential, with frequency depending on water hardness; very hard water may require weekly attention to prevent damage.
- Consistent weekly cleaning of grout, tiles, and seals, along with monthly inspection of filters and the steam head, extends the unit’s lifespan.
- Flushing or auto-draining the generator every few months is crucial for removing mineral buildup and maintaining optimal performance.
- Using the correct cleaners, avoiding bleach and acids on natural stone, helps preserve seals, surfaces, and prevent damage.
- Annual professional maintenance, including full inspection, descaling, and part replacement, is necessary to keep the system functioning safely and under warranty.
Table of Contents
- Steam Shower Maintenance Checklist for Daily, Weekly, and Monthly Care
- Daily and Weekly Cleaning: Glass, Tile, Grout, and Seals
- Steam Generator Maintenance: Flushing, Filters, Valves, and Wiring
- Descaling Steam Showers: Method and Frequency by Water Hardness
- Troubleshooting: Reduced Steam, Odd Noises, and Odors
- Cleaners and Materials That Will Damage Your Steam Shower
- Annual Professional Service: What It Covers and What It Costs
- Where This Guidance Comes From
- Safety Checks Before Every Steam Shower Session
- Caring for Door Seals and Hardware to Stop Leaks
- Preventing Mold Beyond the Weekly Clean
- Water Quality and Filtration for a Longer Generator Life
- A Small Habit That Prevents Big Repairs
- Steam Shower Parts and Buyer Resources from Importjunkies
- Sources
Steam Shower Maintenance Checklist for Daily, Weekly, and Monthly Care
Most steam shower problems trace back to skipped basics, not mechanical failure. A short routine, done consistently, beats an occasional deep clean every time.
- Daily: Squeegee the glass and wipe down chrome fixtures right after you step out, then crack the door and run your bathroom’s exhaust fan for 20 to 30 minutes to clear residual humidity.
- Weekly: Clean glass, tile, and grout lines with a pH-neutral cleaner, and check the door seal and grout for early gaps or discoloration.
- Monthly: Inspect the steam head for mineral crust, check the drain pan for standing water, and look at any visible filter for buildup. Jot down what you checked in a simple log, even a notes app entry works.
Set two calendar reminders: one weekly for the surface clean, one monthly for the generator check. That’s genuinely most of the job.
Pro Tip: Keep a running log with dates and observations, even three lines a month. When something eventually goes wrong, that log tells a technician exactly when the change started, which saves diagnostic time and often money.
Daily and Weekly Cleaning: Glass, Tile, Grout, and Seals
Squeegee glass panels top to bottom immediately after use, while the surface is still warm and the water hasn’t had time to bond with mineral deposits. Follow with a dry microfiber towel on chrome and metal trim. This two-step habit, done daily, is one of the most effective ways of preventing mold and mineral bonding in a high-humidity enclosure.
For weekly cleaning, stick to these rules:
- Use a pH-neutral, non-abrasive cleaner on glass, ceramic tile, and standard fixtures.
- Diluted white vinegar can handle light mineral spots on tile or grout, but never use it on natural stone or metal hardware, since the acid etches stone and pits chrome over time.
- Rinse vinegar solutions thoroughly after use to prevent degradation of silicone seals.
- For marble, travertine, or granite surfaces, use a stone-specific, pH-balanced cleaner and skip acidic products entirely.
- Reseal natural stone every 12 to 18 months, more often if you notice water no longer beading on the surface.
- Scrub grout lines with a soft brush and a baking-soda paste for stubborn spots, then reapply grout sealant annually to block moisture penetration.
None of this requires special tools. It requires consistency, which is the part most owners skip until the shower starts smelling musty or the glass gets a permanent haze.
Steam Generator Maintenance: Flushing, Filters, Valves, and Wiring
Your generator does the real work, and it’s also the component most owners neglect because it’s tucked away in a closet or crawlspace. Two flushing approaches exist. AutoFlush, also called auto-drain, runs automatically for 5 to 10 minutes after each session and can cut manual descaling needs by roughly 75 percent. Units without that feature need a manual flush, which means draining the tank through the designated valve after a set number of uses, per your manufacturer’s instructions.
Run through this sequence every few months, or whenever you’re doing a deeper check:
- Shut off power at the breaker before touching anything electrical or plumbing-related on the unit.
- Inspect the inlet valve and solenoid for mineral crust or slow response. A sluggish solenoid is often an early scale symptom.
- Open the filter housing, if your model has one, and check for discoloration or clogging.
- Confirm the drain cycle completes fully. Water that sits in the tank for extended periods accelerates scale formation.
- Restore power and run a short test cycle to confirm normal heat-up time.
Filters typically need replacement every 6 to 12 months depending on usage and water quality. They protect the tank and heating elements from the coarser particles that hard water carries, so a clogged or missing filter shortens the life of everything downstream.
Stop and call a licensed technician if you see repeated error codes, smell burning or ozone near the control panel, notice exposed or frayed wiring, or find water pooling near electrical connections. Those are not weekend-project fixes. The same caution applies to any auto lift or heavy equipment you maintain at home: know when a job needs a qualified technician instead of a DIY attempt.
Pro Tip: If your unit lacks AutoFlush, mark your calendar the same day you flush, not just “sometime this month.” Vague reminders are the number one reason manual-flush units end up with heavier scale buildup than owners expect.
Descaling Steam Showers: Method and Frequency by Water Hardness
Scale is calcium and magnesium carbonate that bonds to heating elements and tank walls, and it doesn’t just look bad. It insulates the heating element, forces the generator to work harder, and shortens the tank’s service life. Mineral deposits are a leading contributor to reduced steam output and premature element failure in residential units, which is why routine descaling matters as much as surface cleaning.
Manual descaling follows a straightforward sequence:
- Power off the unit and let it cool completely.
- Locate the pressure relief valve (PRV) or fill port per your manual.
- Mix food-grade citric acid with warm water and pour it into the tank, then let it soak for the duration your manufacturer specifies, usually 30 to 60 minutes.
- Flush the tank two or three times with clean water until it runs clear.
Citric acid is generally preferred over straight vinegar for internal descaling because it dissolves calcium carbonate effectively without leaving the sharp acetic odor that vinegar tends to carry into the steam.
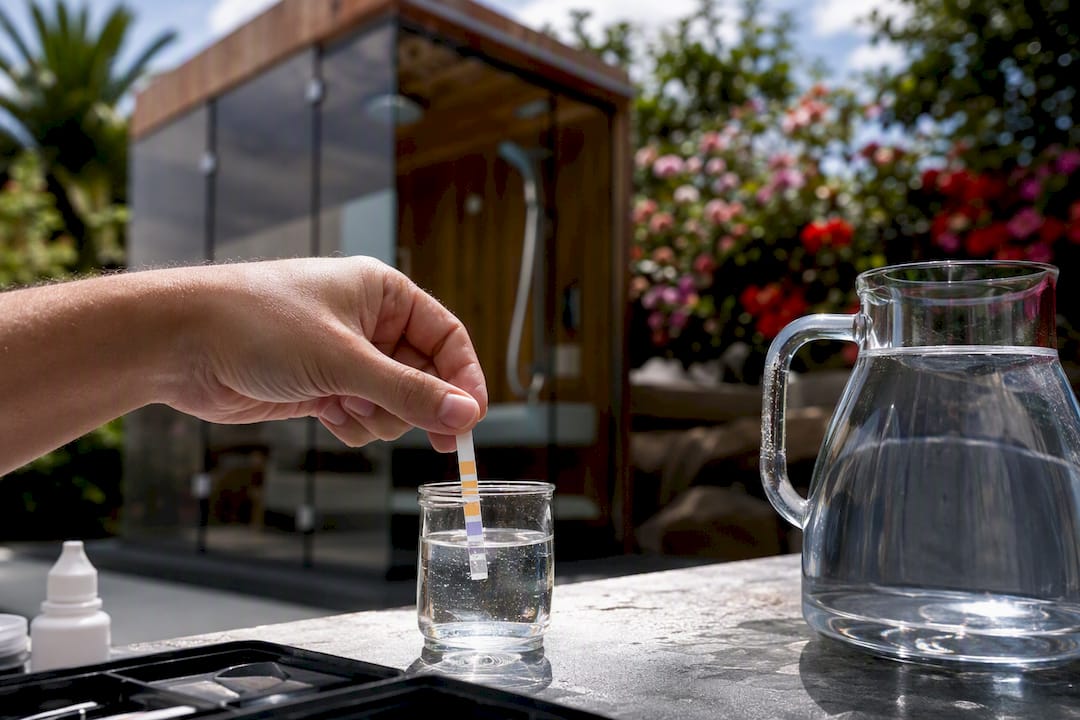
Frequency depends on your local water hardness, which you can check with a home test kit or your municipal water report. The USGS hardness scale classifies water from soft to very hard based on calcium and magnesium content. As a general guide: soft water often stretches to a 3 to 4 month interval, moderate water sits around 6 to 8 weeks, hard water needs attention every 4 weeks, and very hard water may require descaling every 2 to 3 weeks unless the unit has AutoFlush, which extends most of these intervals significantly.
Troubleshooting: Reduced Steam, Odd Noises, and Odors
A generator rarely fails without warning. Watch for these signs before they turn into a service call:
- Slow heat-up or noticeably weaker steam output than usual.
- A steam head that “spits” water instead of producing a clean vapor stream.
- Whistling or knocking noises during operation.
- Metallic or musty odors coming from the vents or steam head.
These symptoms usually point to internal scale buildup, and a flush or descale often resolves them. Before calling a technician, check the inlet water supply is fully open, inspect the steam head for visible crust, and run a manual flush if your unit allows it.
If you smell anything electrical, notice tripped breakers, or see water near the control panel, shut the system down at the breaker and call a professional. Don’t attempt to open the generator housing while it’s powered or still hot.
Cleaners and Materials That Will Damage Your Steam Shower
Skip these products entirely, even though some feel like an obvious “deep clean” choice:
- Bleach, which breaks down silicone seals and gaskets and can release harmful fumes when heated inside a closed steam enclosure.
- Straight vinegar or any strong acid on marble, travertine, limestone, or other natural stone, since it etches and dulls the surface permanently.
- Abrasive scrub pads or powders, which scratch glass and tile finishes and create tiny grooves where mineral deposits collect faster.
Use pH-neutral, stone-safe, or manufacturer-approved cleaners instead. Anything with a strong chemical smell is a signal it will volatilize and circulate through your steam, which nobody wants to breathe.
Annual Professional Service: What It Covers and What It Costs
A yearly inspection should include a full flush and descale, a wiring check, gasket and valve inspection with replacement as needed, and a functional test of all safety controls. Expect a service call in the range of $150 to $400, more if elements, gaskets, or valves need replacing.
This visit also protects your manufacturer warranty, which often requires documented maintenance. Keep receipts and service notes alongside your own log. A routine schedule of daily care, weekly cleaning, and annual professional inspection is what actually prevents the expensive failures.
Where This Guidance Comes From
Importjunkies sells steam shower enclosures and generator components directly to homeowners, which means these recommendations get filtered through actual product specs and warranty terms, not generic blog advice. Gary, who covers equipment maintenance and buyer guidance for the site, draws on manufacturer documentation and the site’s own steam shower buyer guide to keep this advice aligned with what actually keeps these units under warranty and running.
Safety Checks Before Every Steam Shower Session
Steam showers combine electricity, water, and heat in a small enclosed space, which means a few safety habits matter as much as any cleaning routine. Before each session, glance at the control panel for visible moisture, cracked buttons, or exposed wiring near the unit. Any of those warrants shutting the system off at the breaker until a technician looks at it.
Confirm your generator is installed with a ground-fault circuit interrupter (GFCI), if local code requires one for your setup, and never override it because it “trips too often.” A tripping GFCI is usually telling you something, not being oversensitive.
Check that the enclosure door seals fully before starting a session. A gap lets steam escape into surrounding drywall and electrical fixtures outside the shower, which is a moisture problem you don’t want migrating into your walls.
Never place towels, bath mats, or other objects over the steam head or vents. Blocked vents cause pressure buildup and can damage the unit or scald anyone nearby. If you have young children or elderly family members using the shower, confirm the unit’s maximum temperature setting is capped at a comfortable, safe level rather than left at a builder’s default.
Finally, if you ever smell anything electrical or notice a breaker tripping repeatedly during steam sessions, stop using the shower and call a licensed technician. That’s not a maintenance task to defer.
Caring for Door Seals and Hardware to Stop Leaks
The door seal is the single component most responsible for steam escaping where it shouldn’t, and it’s also the easiest thing to neglect because it’s rubber, not glass or tile. Wipe the seal dry after every session along with the glass, since trapped moisture is what breaks silicone down early.
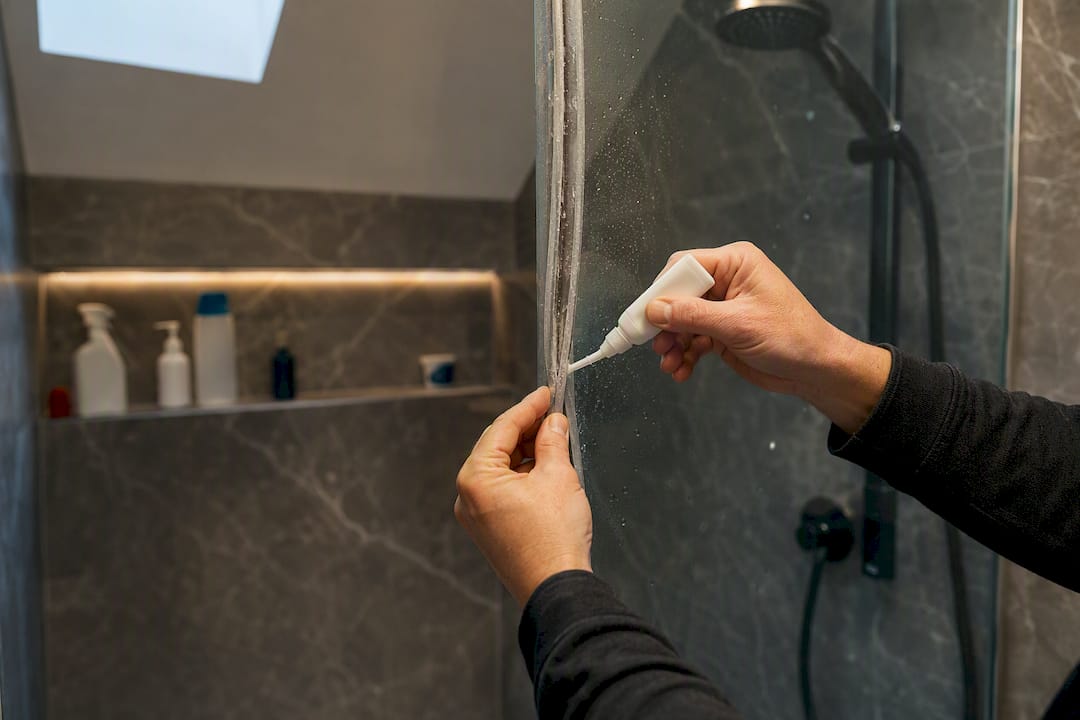
Inspect the gasket monthly for cracking, flattening, or gaps where it no longer meets the frame evenly. A seal that’s lost its spring will let steam leak into the bathroom, which raises humidity outside the enclosure and puts stress on nearby drywall and paint.
Clean the seal with a pH-neutral cleaner and a soft cloth, never bleach or ammonia-based products, both of which accelerate rubber breakdown. A thin layer of silicone-safe lubricant applied every few months keeps the gasket supple and helps it seal fully rather than compress unevenly over time.
Check door hardware, hinges, handles, and the latch mechanism, for corrosion or stiffness. Tighten any loose hardware promptly, since a door that doesn’t close flush against the frame defeats the seal no matter how good the gasket itself is. If you notice the door no longer closes evenly, check the hinges before assuming the seal has failed. Sometimes it’s alignment, not the rubber, and that’s a much cheaper fix.
Preventing Mold Beyond the Weekly Clean
Cleaning surfaces handles visible mold, but the real prevention happens in how well moisture leaves the enclosure between uses. Your bathroom’s exhaust fan, or a dedicated ventilation system if your steam shower has one, needs its own maintenance schedule. Dust and lint clog fan housings over time, which quietly reduces airflow long before you’d notice from the switch working normally.
Clean or replace fan filters every few months, and vacuum the fan housing annually to keep it moving air at full capacity. If your exhaust vents to the exterior, check the vent cap outside periodically for debris, birds, or blockages, since a blocked exterior vent can push humid air back into your walls instead of outside.
Leave the shower door cracked between uses whenever practical, not just immediately after stepping out. A fully sealed, humid enclosure sitting closed for hours gives mold spores exactly the environment they need. Some owners install a small dehumidifier or moisture-sensing fan switch that keeps running until humidity drops to a set level, which removes the guesswork of manually timing your fan.
Check caulk lines around the enclosure’s base and corners every few months. Caulk that’s cracked or separating lets moisture behind tile and drywall, which is where mold problems actually become expensive rather than cosmetic.
Water Quality and Filtration for a Longer Generator Life
Everything about scale and descaling frequency traces back to what’s actually in your water supply. Calcium and magnesium content, measured as water hardness, determines how fast minerals bond to your generator’s heating element and tank walls. The USGS hardness classification breaks water down from soft to very hard, and knowing where your household falls changes your entire maintenance calculus.
A home test kit, sold at most hardware stores, gives you a hardness reading in a few minutes. Alternatively, most municipal water suppliers publish annual water quality reports that include hardness figures, worth checking before you guess at a descaling schedule.
If your water tests hard or very hard, consider a whole-house or point-of-use water softener feeding the steam generator’s supply line. Softened water dramatically slows mineral buildup, which means longer intervals between descaling sessions and less strain on the heating element over the unit’s lifespan. Even a simple inline scale-reducing filter, cheaper than a full softener, catches some of the coarser mineral content before it reaches the tank.
Whatever your water quality, pair it with the filter maintenance covered earlier in the generator section. Filtration at the water-supply level and filter maintenance inside the unit work together, not as substitutes for each other.
A Small Habit That Prevents Big Repairs
Tie your steam shower checks to something you already do on a schedule, like the day you change bath towels or restock bathroom supplies. That single link turns “I should check the generator sometime” into an actual recurring habit instead of a task that slides for months. Small, boring consistency beats an annual scramble every time. The owners who avoid major repairs aren’t doing anything exotic. They’re just not skipping the easy stuff.
— Gary
Steam Shower Parts and Buyer Resources from Importjunkies
Importjunkies stocks steam shower enclosures, replacement steam heads, and gasket components directly, so when a part wears out you’re not stuck hunting through third-party marketplaces guessing at compatibility. That’s the practical advantage here: one place to check specs, confirm fitment, and order the part instead of piecing together a repair from mismatched sources.
If you’re shopping for a full enclosure or comparing options before you buy, the steam shower buyer guide walks through sizing and installation considerations, and product pages like the corner steam shower and bathtub enclosure list full specs so you can check dimensions against your bathroom layout before ordering. Have a fitment or warranty question on a specific part? Contact Importjunkies customer service directly, they can confirm compatibility before you check out rather than after a return request.
Sources
- 5 Tips to Keep Your Steam Shower Clean and Performing at Its Best
- Top 3 Maintenance Tips for Your Steam Generator
- USGS—Hardness and alkalinity overview
- Steam Generator Maintenance Tips for Your Home Steam Shower - Benner Plumbing & Heating LTD.
- How to Clean a Steam Shower and Steam Generator Maintenance Guide


