


 Location
 Login
Login
TL;DR:
- Getting an electric vehicle on the road is simple, but reliable, safe charging requires careful planning and assessment.
- Before installation, consider vehicle specs, electrical capacity, permits, and future expansion needs to ensure a cost-effective, code-compliant setup from the start.
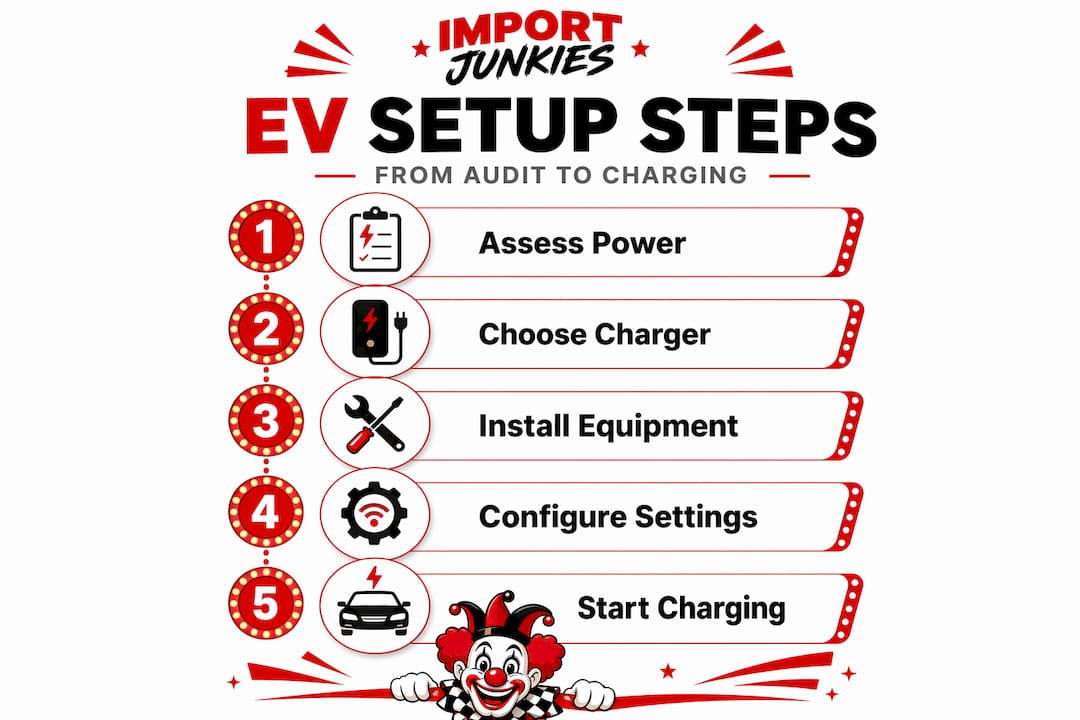
Getting an electric vehicle on the road is straightforward. Getting it charged reliably and safely is where most people run into trouble. Whether you’re setting up your first home charger or building out a depot for a small fleet, a solid electric vehicle setup guide covers far more than just plugging something in. You need to think through electrical capacity, equipment compatibility, permit requirements, and long-term maintenance before a single wire gets run. This guide walks you through every stage, from reading your vehicle’s specs to optimizing charging costs, so your setup works correctly from day one.
Table of Contents
- Key Takeaways
- Your electric vehicle setup guide starts here
- Assessing your electrical infrastructure
- Selecting and installing charging equipment
- Optimizing and maintaining your EV setup
- My take on what most people get wrong
- Electric utility vehicles from Importjunkies
- FAQ
Key Takeaways
| Point | Details |
|---|---|
| Match vehicle specs first | Your car’s onboard charger limit determines charging speed, not the charger rating alone. |
| Size circuits at 125% | EV chargers are continuous loads, so breaker and conductor ratings must exceed the charger’s output by 25%. |
| Get permits before installation | Skipping inspections creates safety risks and may void equipment warranties or insurance coverage. |
| Use scheduled charging | Off-peak charging can meaningfully reduce electricity costs for both homeowners and business operators. |
| Plan ahead for multiple vehicles | Pre-cabling for additional charging points costs far less during initial installation than retrofitting later. |
Your electric vehicle setup guide starts here
Before any equipment gets ordered, you need to understand what your specific EV actually requires. The term EVSE, which stands for Electric Vehicle Supply Equipment, is the industry-standard label for what most people call a “charger.” Technically, the charger lives inside the vehicle. The EVSE delivers conditioned power to that onboard charger. That distinction matters because charging speed is constrained by whichever component in the chain has the lowest capacity: the vehicle’s AC acceptance rate, the EVSE output, or the circuit capacity feeding it.
Here’s what you need to gather before shopping for equipment:
- Onboard charger rating: Check your vehicle manual or manufacturer spec sheet. A vehicle with a 7.2 kW onboard charger cannot accept power faster than that, regardless of what the EVSE can deliver.
- Connector type: The two dominant standards in the U.S. are SAE J1772 for Level 1 and Level 2 AC charging and CCS for DC fast charging. Connector compatibility is critical, though adapters exist to bridge different standards when needed.
- Daily mileage: A commuter driving 30 miles per day needs far less overnight charge recovery than a delivery driver covering 80 miles. Knowing your real usage helps you avoid overspending on equipment you don’t need.
- Battery capacity: A 40 kWh battery charging from 20% to 80% needs roughly 24 kWh. At a 7.2 kW charge rate, that takes about 3.5 hours. These numbers tell you whether a Level 1 outlet or a Level 2 installation is actually necessary for your situation.
Pro Tip: Don’t size your charger based on the maximum the vehicle can accept. Size it based on how much charge you realistically need to recover overnight. Many drivers do fine with a 32-amp Level 2 charger rather than a 48-amp unit, and a smaller charger means a smaller circuit.
If you’re setting up vehicles for a facility or fleet, reviewing how electric vehicles transform operations at managed sites can help you think through usage patterns before locking in your equipment choices.
Assessing your electrical infrastructure
This is the step most people skip or underestimate, and it’s the one that causes the most expensive problems. Before buying any EVSE, you need a clear picture of your electrical panel and what it can actually support.
Start by locating your main service panel and checking the total amperage rating, typically 100A, 200A, or 400A for residential installations. Then identify how much of that capacity is already committed to existing loads. A 200A panel with a large HVAC system, electric range, electric water heater, and electric dryer may have very little spare capacity available for a 40A or 50A EV circuit.
Key site assessment factors to evaluate:
- Panel capacity and available breaker slots: You need at least one open double-pole slot for a Level 2 circuit. If the panel is full, a subpanel or load management system may be required.
- Cable routing distance: The longer the run from panel to parking spot, the larger the wire gauge needed to avoid voltage drop. Runs over 50 feet may require a wire upgrade even if the amperage looks fine on paper.
- Indoor vs. outdoor placement: Outdoor EVSE units must be rated for weather exposure. Conduit routing through exterior walls adds labor and material cost.
- Local permit requirements: Most U.S. jurisdictions require a permit and inspection for new EV circuits. Professional installation by a licensed electrician handles load calculations, permits, wiring, and code compliance.
| Assessment Factor | What to Check | Why It Matters |
|---|---|---|
| Panel amperage rating | Total service size (100A, 200A, 400A) | Determines whether capacity exists for an added circuit |
| Available breaker slots | Open double-pole positions | Needed for a dedicated Level 2 circuit |
| Cable run distance | Panel to parking location in feet | Affects wire gauge requirements and installation cost |
| Outdoor rating requirements | Parking area weather exposure | Determines EVSE enclosure and conduit requirements |
| Local code and permits | Municipal or county requirements | Required for legal, inspected installation |
Pro Tip: If you’re building out a commercial property or managing multiple vehicles, pre-cabling conduit and running larger-capacity feeders during initial construction costs a fraction of what a retrofit will cost later. Early infrastructure planning for EV charging in new buildings is increasingly being codified into building standards for exactly this reason.
Selecting and installing charging equipment
Once you understand your vehicle’s requirements and your site’s capacity, equipment selection becomes much clearer. The fundamental decision is between Level 1 and Level 2 charging.
Level 1 uses a standard 120V outlet and delivers roughly 3 to 5 miles of range per hour. It requires no new electrical work and costs almost nothing to set up. For plug-in hybrids or drivers with small batteries and modest daily mileage, Level 1 is genuinely adequate.
Level 2 operates on 240V and delivers 15 to 30 miles of range per hour depending on the circuit and vehicle. This is the standard choice for most full battery EV owners and all commercial or fleet applications.
Here is the standard workflow for a Level 2 installation:
- Confirm your vehicle’s onboard charger rating and select an EVSE that matches or slightly exceeds it.
- Calculate the required circuit size. EVSE is classified as a continuous load under NEC 625.42, meaning conductors and breakers must be rated at 125% of the charger’s maximum draw. A 40-amp charger requires a 50-amp breaker and appropriately sized conductors.
- Obtain the required permit from your local building or electrical authority.
- Have a licensed electrician install the dedicated circuit, conduit, and mounting hardware.
- Mount the EVSE at a height accessible for daily use, typically 48 inches from the floor to the center of the unit.
- Schedule the inspection before energizing the circuit.
- Test the installation with the vehicle before signing off.
“Treating EV charging as a continuous load is not optional padding. It is a code requirement under NEC 625.42 that must be respected for safety and long-term reliability.” — Branch Circuit Sizing, 125% Rule
When choosing between hardwired and plug-in EVSE units, hardwired installations are more permanent and generally preferred for commercial use. Plug-in units on a 14-50 outlet offer portability if you need to move the charger later.
For businesses managing multiple vehicles, smart EVSE units with OCPP 1.6 protocol support load balancing, remote monitoring, and scheduled charging across multiple charging points from a single interface. That’s the difference between a collection of standalone chargers and an actual managed charging system.
Pro Tip: Always verify that your EVSE carries a UL or ETL safety certification. Uncertified units may not pass inspection and create liability exposure, particularly in commercial settings. For guidance on safe battery charging practices, including connection protocols and safety checks, reviewing established automotive charging resources before installation is time well spent.
Optimizing and maintaining your EV setup
Getting the equipment installed is only part of the job. How you configure and operate that equipment determines whether your setup actually saves you money and holds up over time. This is where the electric vehicle maintenance guide thinking comes in.
The first configuration step after installation is setting the charger current limit to match your circuit. Many EVSE units ship at their maximum output. If your circuit is sized for 32 amps continuous but the charger defaults to 40 amps, you have a mismatch. Set the charger output to match the circuit capacity as confirmed during inspection.
For cost management, scheduled charging is one of the most effective tools available. Home charging is where most EV owners charge most of the time, and most utilities offer time-of-use rates that make overnight charging significantly cheaper than daytime charging. Programming your charger to run from 11 PM to 6 AM, or whatever your utility’s off-peak window is, can cut per-charge costs by 30% to 50% depending on your rate structure.
Ongoing maintenance best practices include:
- Inspect the connector and cable monthly. Look for fraying, discoloration, or physical damage. Replace damaged cables before they cause connection issues or tripping breakers.
- Check mounting hardware annually. Vibration from repeated plug cycles can loosen wall mounts over time. A loose EVSE is both a safety issue and a nuisance.
- Monitor for fault codes. Modern EVSE units log errors. Review them periodically rather than waiting for a failure to investigate.
- Verify panel connections every two to three years. Thermal cycling from repeated charging loads can cause terminal connections to loosen. A licensed electrician should check torque on breaker connections during routine electrical maintenance.
For business operators managing a small fleet, the same EV home charging solutions logic applies at scale. Group your vehicles by charge need and assign each one a charging window to avoid peak load spikes. Use your EVSE’s load management features to cap total site draw below your utility demand threshold, which prevents expensive demand charges from showing up on your bill.
Pro Tip: Don’t wait for a problem to update your charger firmware. Most smart EVSE manufacturers push updates that improve reliability, fix communication bugs, and occasionally add scheduling features. Check for updates every six months as part of routine maintenance.
My take on what most people get wrong
I’ve seen a lot of EV setups go sideways, and the common thread is almost never the equipment. It’s the planning that comes before the equipment.
The number one mistake I see is people buying the most powerful EVSE they can find without first checking their vehicle’s onboard charger rating. A 48-amp charger paired with a vehicle that only accepts 32 amps charges at exactly the same speed as a 32-amp charger. You’ve paid for a larger circuit, heavier wire, and a more expensive unit for zero practical benefit. Balancing all three constraints — vehicle capacity, charger output, and circuit size — is what separates a well-planned installation from money sitting idle.
The second mistake, particularly for businesses and property owners, is thinking small when running the initial conduit. Running conduit is cheap. Retrofitting conduit through finished walls and ceilings later is not. I’ve worked with operators who spent more on a second-phase conduit run than they did on their entire first-phase installation. If there’s any possibility you’ll add a second or third vehicle in the next five years, run the conduit now and pull the wire later when you need it.
What I genuinely appreciate about the best setups I’ve seen is the discipline of treating every charging point as a permanent, code-compliant electrical installation rather than a convenience device. That mindset changes how you plan, who you hire, and what you inspect before calling the job done.
— Gary
Electric utility vehicles from Importjunkies

If you’re setting up charging infrastructure and also looking for the right electric vehicle to go with it, Importjunkies carries a strong selection of electric utility vehicles suited for personal property use, golf facility operations, and small commercial fleets. The 48V Renegade Edition Utility Golf UTV is a 4-seater built for real utility work, not just course transport. For a sleek alternative, the Silver Renegade X Edition delivers the same 48V electric drivetrain with updated styling. Both models are straightforward to integrate with a standard Level 1 or Level 2 home charging setup. If you’re still comparing your options, the electric vs. gas cart breakdown on the Importjunkies blog is worth reading before you commit.
FAQ
What circuit size does a Level 2 EV charger require?
A 40-amp Level 2 charger requires a 50-amp dedicated circuit breaker because EVSE is classified as a continuous load, and NEC rules require breakers and conductors rated at 125% of the continuous draw.
Do I need a permit to install a home EV charger?
Yes. Most U.S. jurisdictions require a permit and inspection for any new 240V circuit installation, including Level 2 EV chargers. Skipping the permit creates safety risk and can void your homeowner’s insurance coverage in the event of an incident.
Can I use a regular outlet to charge my EV?
A standard 120V outlet supports Level 1 charging, which delivers roughly 3 to 5 miles of range per hour. This works for plug-in hybrids and light daily users but is too slow for most full battery EV owners who need to recover significant range overnight.
What is the best way to reduce EV charging costs?
Using scheduled off-peak charging through your EVSE’s timer function and enrolling in a time-of-use utility rate plan are the two most effective strategies. Charging during off-peak hours, typically late night to early morning, can cut per-charge electricity costs significantly.
How often should I inspect my home EV charger?
Check the connector and cable for physical damage monthly, review any logged fault codes quarterly, and have a licensed electrician verify panel and breaker connections every two to three years as part of routine electrical maintenance.
Recommended
- Electric bike buying guide: find the right e-bike for your ride – Saferwholesale || Import Junkies || Great Sports
- How to register a utility vehicle: step-by-step U.S. guide – Saferwholesale || Import Junkies || Great Sports
- Electric bikes for golf courses: Boost play and sustainability – Saferwholesale || Import Junkies || Great Sports
- Utility Vehicles Explained: Uses, Types, and Right Fit – Saferwholesale || Import Junkies || Great Sports


