


 Location
 Login
Login
TL;DR:
- Performing regular, systematic inspections of off-road vehicles ensures safety and prevents mechanical failures. Owners should conduct pre-ride checks every time and comprehensive inspections every three months or at manufacturer intervals. Log and address defects promptly to maintain vehicle safety and compliance standards.
The off-road vehicle inspection process is a systematic safety and compliance check every owner or buyer must complete before operating or purchasing any off-road vehicle. Skipping it puts you at real risk. Safety-critical defects on off-road machinery represent potential catastrophic failures, not just repair inconveniences. A thorough vehicle inspection checklist covers tires, brakes, suspension, steering, electrical systems, and fluids. Whether you ride ATVs, UTVs, golf carts, or utility vehicles, a structured pre-ride or pre-purchase evaluation is the single most reliable way to protect yourself and your investment.
What are the essential components to inspect on off-road vehicles?
A complete off-road vehicle safety check covers eight core systems. Each system has specific inspection criteria that tell you whether the vehicle is safe to operate or needs attention before you ride.
- Tires and wheels: Check tread depth, sidewall condition, and inflation pressure. UTV tire pressure should stay between 8 and 18 PSI depending on terrain and manufacturer specs. Any tire with tread below 1.5 mm fails professional light-vehicle inspection standards and needs immediate replacement.
- Brakes: Inspect pad thickness, rotor condition, and brake fluid level. Spongy pedal feel or grinding sounds signal worn components.
- Suspension: Look for bent control arms, cracked bushings, and leaking shock absorbers. Worn suspension affects handling on uneven terrain.
- Steering: Check for excessive play in the steering wheel and inspect tie rods and ball joints for looseness.
- Engine and fluids: Verify oil level, coolant level, and look for active leaks under the vehicle. Low or contaminated fluids accelerate engine wear.
- Electrical systems: Test the battery, starter, and all wiring connections. Corroded terminals are a common failure point on vehicles stored outdoors.
- Lighting: Confirm headlights, taillights, and brake lights function. Many jurisdictions require working lights for road-legal off-road vehicles.
- Recovery equipment: Check tow points, recovery straps, and any mounted accessories for secure attachment.
The table below summarizes each system with the key attributes to check and the standard to meet.
| System | Key attributes to check | Standard or threshold |
|---|---|---|
| Tires and wheels | Tread depth, pressure, sidewall cracks | Minimum 1.5 mm tread; 8–18 PSI for UTVs |
| Brakes | Pad thickness, rotor wear, fluid level | No metal-on-metal contact; clear fluid |
| Suspension | Bushings, shocks, control arms | No cracks, leaks, or excessive play |
| Steering | Wheel play, tie rods, ball joints | Less than 1 inch of free play |
| Engine and fluids | Oil, coolant, transmission fluid | At manufacturer fill line; no active leaks |
| Electrical | Battery voltage, wiring, connections | Secure terminals; no frayed wires |
| Lighting | All exterior lights | Full function required |
| Recovery gear | Tow hooks, straps, mounts | Rated capacity; no fraying or rust |
Pro Tip: Squeeze each ball joint and wheel bearing by hand while the vehicle is on a lift. Visual inspection alone misses internal wear that only tactile diagnosis reveals.
How to perform a step-by-step off-road vehicle inspection
The professional standard for any off-road vehicle evaluation process starts with preparation, then moves through a consistent physical sequence. Rushing the process or skipping steps is where most owners miss critical defects.
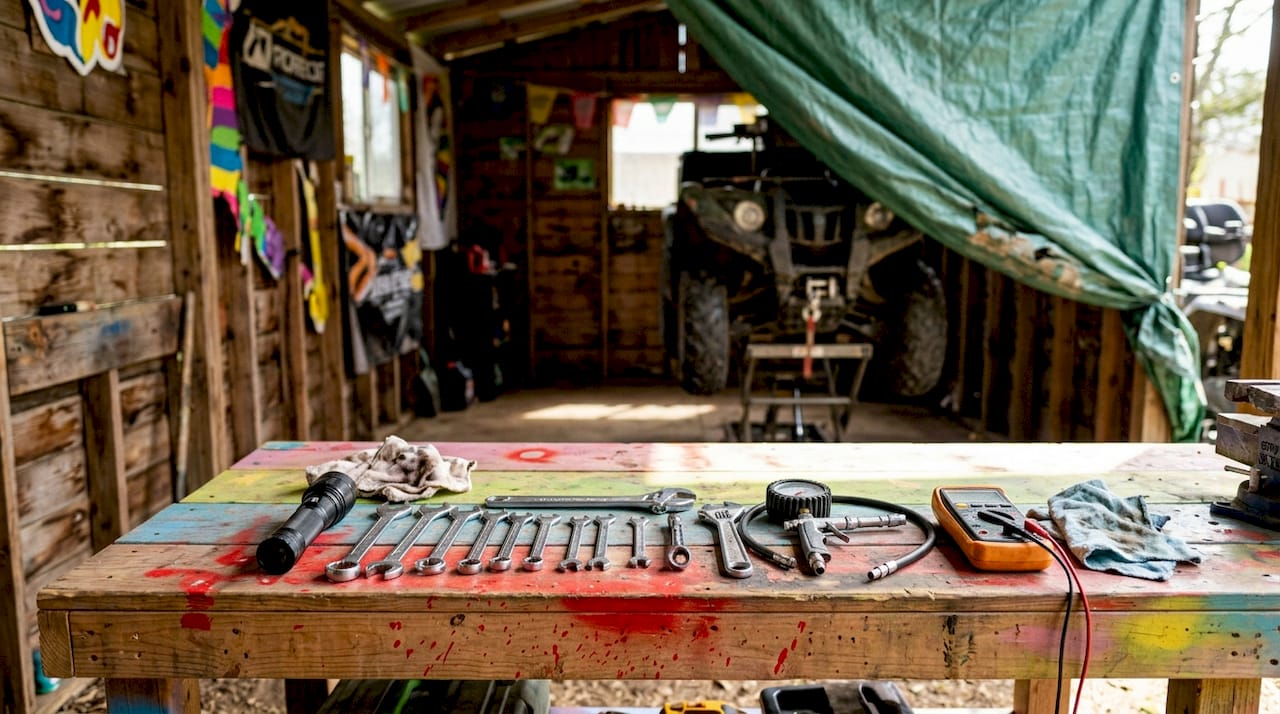
Tools you need before you start
Gather a tire pressure gauge, flashlight, floor jack, jack stands, a torque wrench, and a clean rag. A digital multimeter helps test battery voltage and electrical connections accurately.
The inspection sequence
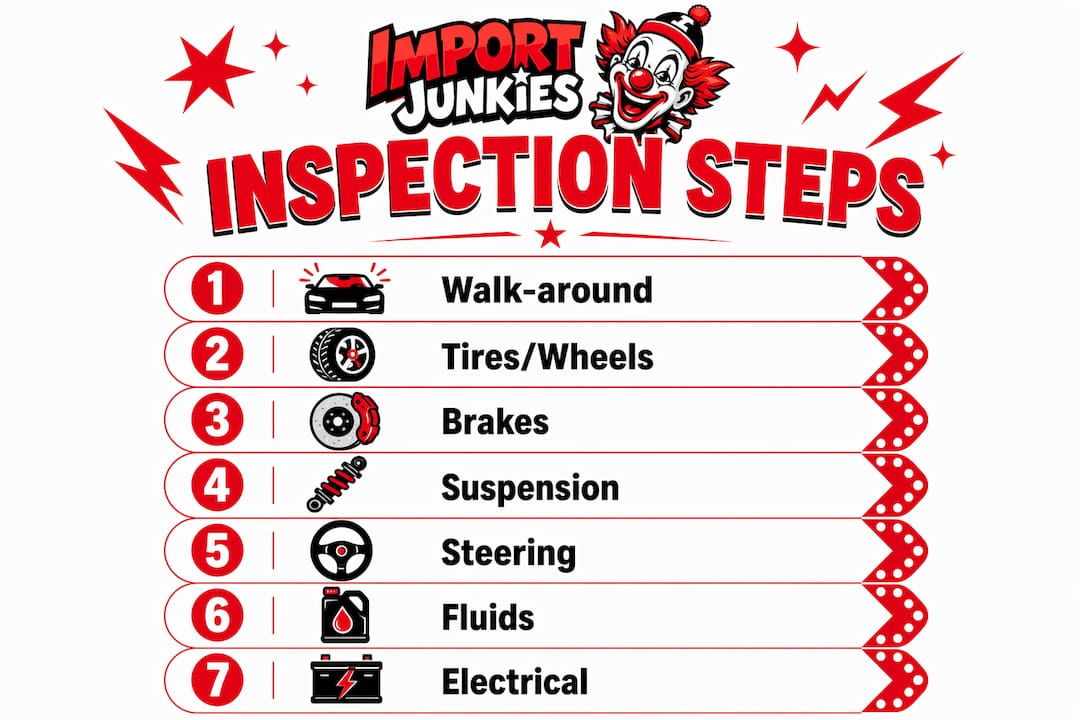
- Park on level ground and engage the parking brake. A flat surface gives you accurate fluid readings and stable access under the vehicle.
- Perform a clockwise 360-degree walk-around. Always follow the same physical path to avoid skipping components. Start at the driver’s side front tire and move clockwise around the entire vehicle.
- Check all fluid levels with the engine cold. Oil, coolant, brake fluid, and transmission fluid should all be at their marked fill lines.
- Inspect tires and wheels. Measure tread depth at three points across each tire. Check pressure against the manufacturer’s spec, which for UTVs typically falls in the 8–18 PSI range.
- Test the brakes. Press the brake pedal firmly and hold it. A pedal that sinks slowly indicates a fluid leak or failing master cylinder.
- Inspect the suspension and steering. Grab each front tire at the 9 o’clock and 3 o’clock positions and push and pull to feel for play in the tie rods and wheel bearings.
- Raise the vehicle and inspect the undercarriage. Visual inspections miss internal failures that only become apparent when you can access the frame, axles, and brake lines from below.
- Test all electrical systems and lights. Cycle through headlights, brake lights, turn signals, and the horn if equipped.
- Document every finding. Note the date, mileage, and condition of each system. This log becomes your maintenance baseline.
| Step | Focus area | Tools needed |
|---|---|---|
| Walk-around | Exterior damage, leaks, tire condition | Flashlight, eyes |
| Fluid check | Oil, coolant, brake fluid, transmission fluid | Rag, flashlight |
| Tire inspection | Tread depth, pressure, sidewall condition | Tread gauge, tire pressure gauge |
| Brake test | Pedal feel, pad thickness, rotor condition | Floor jack, flashlight |
| Undercarriage check | Frame, axles, brake lines, suspension mounts | Jack stands, flashlight |
| Electrical test | Battery, lights, wiring | Multimeter, visual check |
Pro Tip: If you are buying a used vehicle, schedule a pre-inspection consultation at a specialized shop before any formal safety inspection. Shops identify common failure points in advance, which reduces reinspection costs and surprises.
What are common off-road vehicle defects and how do you address them?
Knowing what to look for separates a useful inspection from a wasted hour. These are the defects found most often during off-road vehicle evaluations, along with the right response for each.
- Tire damage: Sidewall bulges, deep cuts, and embedded debris all require immediate tire replacement. A damaged sidewall can fail without warning at speed. Never patch a sidewall; replace the tire.
- Fluid leaks: Oil or coolant pooling under the vehicle after a short idle period points to a gasket, seal, or hose failure. Small leaks become large ones under off-road stress. Identify the source before the next ride.
- Worn brake components: Brake pads worn past their wear indicator create metal-on-metal contact with the rotor. This reduces stopping power and damages rotors, turning a $40 pad replacement into a $200 rotor job.
- Suspension wear: Cracked or collapsed bushings change how the vehicle handles on rough terrain. Worn shocks reduce ground contact and increase rollover risk on side slopes.
- Electrical faults: Corroded battery terminals and frayed wiring are fire risks on vehicles that vibrate constantly. Clean terminals with a wire brush and replace any wiring with cracked insulation.
Missed defects on heavy machinery are not just repair issues. They represent potential catastrophic safety failures. Treat any defect that affects braking, steering, or tire integrity as a stop-ride condition until repaired.
Logging defects systematically matters as much as finding them. A written or digital record of every defect, its severity, and the repair action taken gives you a clear picture of the vehicle’s condition over time. Owners who track defects consistently catch patterns, such as a suspension component that fails every season, and address root causes rather than repeating the same repairs.
Pro Tip: Prioritize defects in this order: brakes, tires, steering, suspension, then everything else. A vehicle with perfect lighting but failed brakes is not safe to ride.
How often should you inspect your off-road vehicle?
Inspection frequency depends on how hard you ride and what type of vehicle you operate. The general framework has three tiers.
- Pre-ride check (every ride): A quick 10-minute walk-around covering tires, fluid levels, lights, and brake feel. This catches anything that changed since the last ride, such as a slow tire leak or a loose bolt from trail vibration.
- Pre-trip inspection (before any extended outing): A full system check using the nine-step sequence above. Do this before any trip longer than a single day or any ride in remote terrain where a breakdown creates a real safety problem.
- Periodic comprehensive inspection (every 3 months or per manufacturer interval): A complete teardown-level review that includes the undercarriage, all fluid changes, brake component measurement, and electrical system testing. Pre-shift inspection programs for heavy off-road vehicles reduce unscheduled downtime by up to 35% and extend component lifespan by 15–20%. The same principle applies to recreational vehicles.
Tie your periodic inspections to your manufacturer’s maintenance schedule. Most ATVs and UTVs have service intervals for oil changes, air filter replacement, and drive belt inspection. Combining those service tasks with a full safety check saves time and creates a single, consistent record.
Record-keeping is not optional if you plan to sell the vehicle or use it commercially. A documented inspection history adds credibility to a private sale and demonstrates off-road compliance standards to any buyer or inspector. Digital apps that log inspections with photos and timestamps are the most reliable option for owners who ride frequently.
You should also understand that titling and safety inspection are legally separate processes. A vehicle can be legally titled before it passes a mechanical safety inspection in many jurisdictions. Owning the title does not mean the vehicle is road-legal or mechanically safe.
Key Takeaways
A structured off-road vehicle inspection process, performed consistently before every ride and comprehensively every three months, is the most reliable way to prevent mechanical failure and maintain safety.
| Point | Details |
|---|---|
| Start with a 360-degree walk-around | Follow a clockwise path every time to avoid skipping critical components. |
| Check tires against hard thresholds | Replace any tire below 1.5 mm tread depth; keep UTV pressure between 8 and 18 PSI. |
| Treat brake and steering defects as stop-ride conditions | Never operate a vehicle with compromised braking or steering until repaired. |
| Log every defect and repair | A written record reveals patterns and supports resale value or compliance documentation. |
| Titling and safety inspection are separate | A legal title does not confirm a vehicle is mechanically safe or road-legal. |
Why I think most riders underestimate the inspection step
Most off-road vehicle owners treat the pre-ride check as a formality. They glance at the tires, start the engine, and go. That habit is where serious accidents begin.
What I have seen consistently is that the defects that cause real harm are not the obvious ones. A cracked tie rod end looks fine until it separates at speed. A brake line with a pinhole leak feels normal until the fluid drops enough to lose pedal pressure on a downhill. These are not dramatic failures with warning signs. They are quiet failures that a proper inspection catches before they become emergencies.
The 360-degree walk-around technique exists for a reason. Following the same physical path every single time removes the reliance on memory, which is unreliable under time pressure or excitement. Professionals who inspect heavy off-road equipment use this method because it works. Recreational riders should use it for the same reason.
My strongest recommendation for buyers is to get a pre-purchase inspection at a shop that knows off-road vehicles before you hand over money. Sellers rarely disclose every defect, not always out of dishonesty, but because they have normalized the vehicle’s condition. An outside set of eyes with a lift and a torque wrench tells you what the vehicle actually is, not what the seller believes it to be.
Digital inspection logs are worth adopting even if you only ride casually. A photo log with dates takes five minutes per inspection and gives you a record that is genuinely useful when something goes wrong or when you decide to sell.
— Gary
Off-road vehicles worth inspecting before your first ride
Importjunkies carries a full range of off-road vehicles built for riders who take safety seriously from day one. Every vehicle in the catalog is a real candidate for the inspection process covered in this guide.
The 48V Electric Golf Cart 4 Seater Renegade Edition is one of the most popular utility UTVs on the Importjunkies platform, and it ships ready for a full pre-ride inspection using the checklist above. Importjunkies also carries ATVs, scooters, electric bikes, and utility trucks at wholesale pricing direct to the public. Browse the full catalog at Importjunkies.com and use the UTV safety guide to match the right vehicle to your riding needs.
FAQ
What does the off-road vehicle inspection process include?
The off-road vehicle inspection process covers tires, brakes, suspension, steering, engine fluids, electrical systems, lighting, and recovery equipment. Each system is checked against manufacturer specifications and safety thresholds before operation.
How often should you perform an off-road vehicle safety check?
Perform a quick pre-ride check before every outing and a full comprehensive inspection every three months or at your manufacturer’s recommended service interval, whichever comes first.
What is the minimum tire tread depth for off-road vehicles?
Any tire with tread depth below 1.5 mm fails professional light-vehicle inspection standards and requires immediate replacement to maintain safe operation.
Is a vehicle title the same as a safety inspection?
No. Titling and safety inspection are legally distinct processes. A vehicle can be legally titled before it passes a mechanical safety inspection, meaning ownership does not confirm roadworthiness.
When should you hire a professional for an off-road vehicle inspection?
Hire a professional when buying a used vehicle, when the vehicle has been in a collision, or when a visual inspection reveals frame damage or fluid leaks you cannot trace. A shop with a lift can identify internal failures that a walk-around inspection misses.
Recommended
- Your guide to every type of off-road vehicle – Saferwholesale || Import Junkies || Great Sports
- ATV Buying Checklist: First-Time Owner’s Guide – Saferwholesale || Import Junkies || Great Sports
- Off-Road Vehicle Terminology Explained for Enthusiasts – Saferwholesale || Import Junkies || Great Sports
- How to inspect used golf carts: a step-by-step guide – Saferwholesale || Import Junkies || Great Sports


